- Skip to main content

Bright in the Middle
Rigorous and Fun Science Activities


7 Energy Transfer and Transformations WOW Factor Teaching Ideas
Middle School Science , 7th Grade Science NC , Physical Science
Energy transfer and transformations are so much fun to teach! There are so many examples of energy transfers and transformations in our daily life that it’s easy to relay to students. We see it when we turn on a light switch, when we see an ice cube melt, and even when we eat a slice of pizza! We see it happening when we turn on the radio in the car, swing on a swing, and cook on the stove.
This can be a really fun lesson for students! It can be a bit confusing at first, especially when trying to determine the difference between energy transfer vs transformation, but they will get the hang of it!
So how is energy transfer different from energy transformation? Energy transfer occurs when the form of energy doesn’t change. It just moves from one place to another. For example, when you kick a soccer ball, the kinetic energy transfer from your foot to the soccer ball but remains kinetic energy. Energy transformation occurs when energy changes from form for to another. For instance, when grilling, chemical energy from the propane transforms to thermal energy.
Which energy transfer and transformations ides will you choose?

There are SO many more energy transfers and transformations examples that you can share with your students. In this post, I’m going to share how you can relay this information to your students while bringing that WOW factor to your classroom .
First, I will share with you how you can help your students to wonder before you teach the content. Next, I will tell you how you can introduce the content to your students without overwhelming them with too much information at a time. Finally, I will give you some ideas to widen their knowledge on the topic.
Let’s go and see what you can add to your energy transformation and energy transfer lesson plan.
Engaging Students in How Energy Transfers and Transforms
Before beginning a new topic or lesson, I like to get my students intrinsically motivated to learn the subject and wondering about what else they can learn! There are many ways to get your students engaged in energy transfer and transformations. Here are 3 fun ideas!
Bring an Instrument
One of my favorite things to do before beginning this topic is to bring an instrument in and talk about where the sound come from in the first place.
I personally have brought in a keyboard that plugs into the wall. The electrical energy gives it power, but what actually makes it play?
You can bring in an instrument and play it if you know how to or you can even have one of your talented students (or 2) play a song for the class.
Then, have some conversations!
- What form of energy do you hear when the instrument plays?
- Where does this sound energy come from?
- Does the instrument play itself?
Before teaching this lesson, students should already be familiar with the forms of energy . So, when you ask these questions, you should hear terms such as electrical energy, kinetic energy, chemical energy, etc.
Bringing an instrument is a fun way to incorporate music into your classroom and start this energy transfer and transformations lesson off with a bang!
PhET Simulation
Another fun way to get students engaged is to look at energy forms and changes using this PhET Simulation . This first one, in particular, looks at the transfer of energy and it relationship to heat, that is the intro simulation.
If you check the box for energy symbols, you can see how the energy moves when you make adjustments.
The link heaters checkbox allows you to move the heat-cool knobs for both heaters at the same time.
You can move a thermometer to the iron and brick to see the temperature change.
Students can choose their own experiments, or you can choose for them.
Make sure they look at the movement of energy and temperature. They can look at the differences between solids and liquids as well. There are a lot of options here.
This mainly focuses on heat energy and how it transfers. It makes for great conversations when you dive into the lesson. It’s a great energy transfer activity.
Let them have fun and explore!!
After this, they can work on the systems simulation to explore how energy transforms .
Students will have the opportunity to explore different energy resources such as mechanical, chemical, solar energy, and more!
They will see how it goes through a generator, or a solar panel, to transform to heat energy, light energy, and more!

Have a Snack!
I’ll have to admit, this is another awesome favorite of mine. Let your students have a snack.
Then, you can have a lot of discussions about how this will relate to the upcoming lesson.
- How do you feel when you are hungry? (tired, no energy, stomachache)
- Where does your energy come from to keep going? (food)
- Where does food get its energy?
- How does the energy from food turn into energy that help you run?
There are so many questions and fun conversations to be had.
Who doesn’t love a good snack?
Energy Transfer and Energy Transformations Interactive Lessons
Now your students are super excited about learning this topic, so now it’s time to dive in a little deeper.
Whenever you teach content, you want to make sure that you don’t throw too much information to your students at once. You want to allow them to build off of their prior knowledge and allow them to process a chunk at a time.
That’s just want interactive lessons do. They help to overcome overwhelm and reduce cognitive load. If students are given too much information to process, they will end up not learning at all.
They are great for individual learning, direct instruction, science stations, and more!
Energy Transformations and Energy Transfer Interactive Lesson
In this lesson /activity, students will learn all about this topic. Some concepts that are covered include energy transfer definition and examples, energy transformation and examples, energy definition, joules, The Law of Conservation of Energy, forms of energy, how energy can be transferred, and more!

Embedded within the content are interactive activities that students can complete to process what they are learning. There are drag-and-drop activities, type in the text box questions, and more!
These are a lot of fun for students and include research-based strategies to help your students retain material.
You can also find this on TPT .
Heat Transfer Interactive Lesson
If you are interested into diving into heat energy transfer, there is an interactive lesson for that.
This lesson/activity covers radiation, conduction and convection, heat vs. temperature, heat transfer in the atmosphere, and more.
There are a lot of fun embedded activities in this one!
You can also find this on TPT.
Energy Transfer and Transformations Activities to Widen Knowledge
At this point, your students have learned a lot about energy transformation and energy transfer, so now is their moment to take a super deep dive into the content, apply it, and show off what they know. This is their time to widen their knowledge.
Here are three awesome ideas to try!
Solar Ovens
This is a fun STEM activity that you can let your students create to model how solar energy can be transformed into heat energy.
There are so many videos that show you how to makes these. Here’s a cute, but cheesy one , that even your 8 th grade middle school students will secretly like. If you just Google solar ovens, there are tons of options.
This will require some prep work in order to collect materials, build, and test. The results are awesome though.
I love to cook s’mores in these.
After you eat the s’mores, you can talk about further energy transformations that occur. Remember, energy is neither created nor destroyed, so where does it keep going?
You can also set up stations for your students to explore and identify the energy transfers and energy transformation. How is energy transformed and transferred?
Here are some examples that you can set up:
- electric circuits or snap circuits
- melting ice
- eating a snack
- turning on a lamp
- tuning forks
- throwing a ball
- a microscope
There are so many options. You can have your students to determine if it is a transfer of energy or a transformation. Then they can explain.
This is a great activity for students to work together in partners or in groups.
Rube Goldberg Machine
Rube Goldberg machines are great for students to see how energy is transferred and transformed.
Students can try to create their own to turn on a light (mechanical to light energy) or pop a balloon (mechanical to sound energy). This is a great project to tie into your simple machines lesson as well.
Students can use materials such a cardboard, dominoes, marbles, toilet paper rolls, paper, boxes, and more to create their machine.
They should write down each example of energy transfer and transformation after the project is completed.
I wrote all about it in this post!
Help your students master science content!

Reader Interactions
Leave a reply cancel reply.
[…] Energy Transfer and Transformations […]
- Skip to primary navigation
- Skip to main content
- Skip to primary sidebar
Teaching Expertise
- Classroom Ideas
- Teacher’s Life
- Deals & Shopping
- Privacy Policy
Energy Activities For Elementary Students: Ideas, Crafts, And Experiments For All Types Of Energy
December 20, 2023 // by Florence Florah
Are you studying the scientific ideas behind various forms of energy in your classes? Do you want to conduct hands-on activities with your kids to bring your energy lessons to life? Why not consider including some Energy Science Experiments in your lesson plan? Using experiments, you may genuinely involve your kids in understanding various types of energy. It allows learners to engage and participate in the course, adding an interactive component.
Potential and Elastic Energy
1. rubber band stretching.
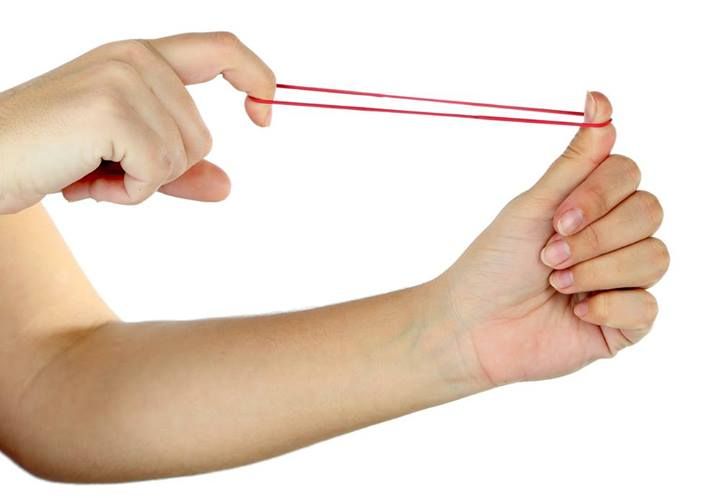
Rubber bands are great illustrators of elastic energy because of their extensibility. Students participate in this exercise by stretching and releasing rubber bands to observe the correlation between the amount of strain and the subsequent distance traveled by the band.
Learn more: The University of British Columbia
2. Rubber Band Car
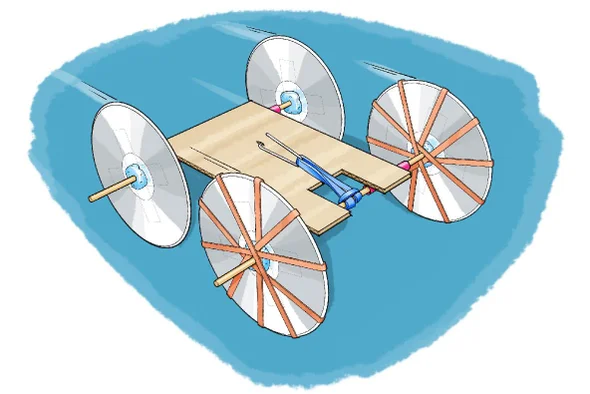
In this elementary grade level project, students construct a vehicle propelled by a rubber band's force. Winding the car's axle stretches the rubber band, storing potential energy. The car's potential energy turns into kinetic energy when the rubber band is released.
Learn more: Scientific American
3. Paper Airplane Launcher
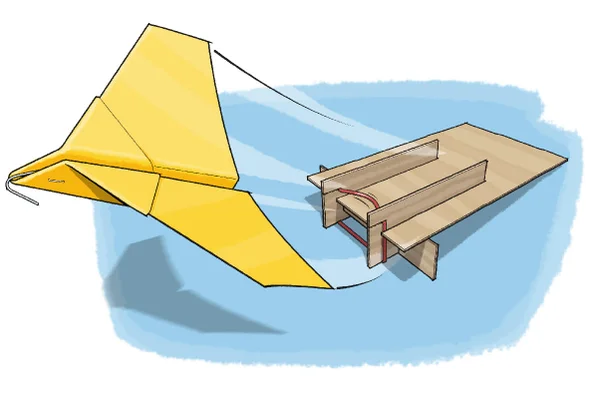
Students will create a rubber band-powered launcher for paper airplanes that will use the elastic energy of a rubber band to send them soaring. The youngsters learn how using the hand and arm to launch an aircraft is different from using a rubber band launcher.
Learn more: My Baba
4. Catapult made on popsicle sticks
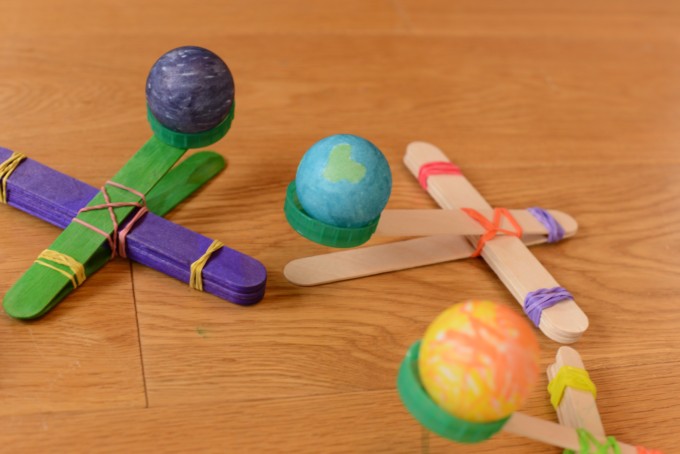
Elementary grade level kids construct a basic catapult in this exercise using recyclable materials, craft sticks, and rubber bands. When you push down on the launching stick, it stores up potential energy, much like an elastic band would do when you stretch it. The energy stored in the stick is transformed into kinetic energy when it is released.
Learn more: Little Bins for Little Hands
5. Chain Reaction of Popsicle Sticks
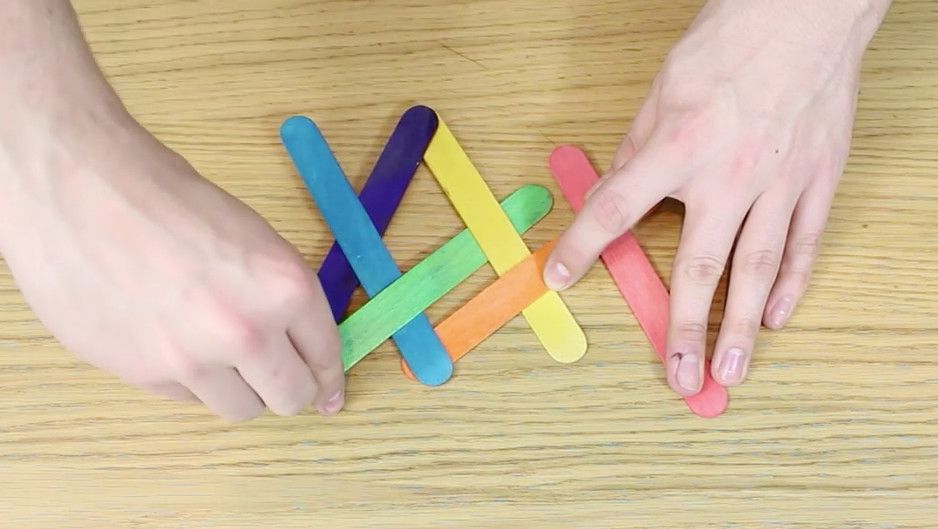
Learners gently weave wooden sticks together in this project, ensuring each piece flexes. The twisted sticks are maintained in position and store potential energy. The free stick snaps back to its usual shape when the first stick is released, converting elastic energy to kinetic energy.
Learn more: Clearway Community Solar
Gravitational Energy
6. acceleration and gravity.
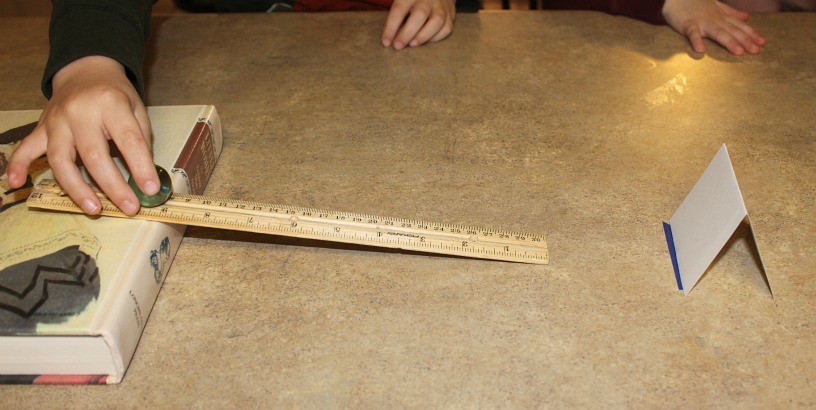
Using cardboard tubes, students study the link between drop height and object speed in this assignment. Gravity increases an object's speed by 9.8 meters per second (m/s) when it is in free fall. Students test the effects of gravity by timing how far a marble slides down a cardboard tube in one second, two seconds, etc.
Learn more: Science Sparks
7. Gravity modeling
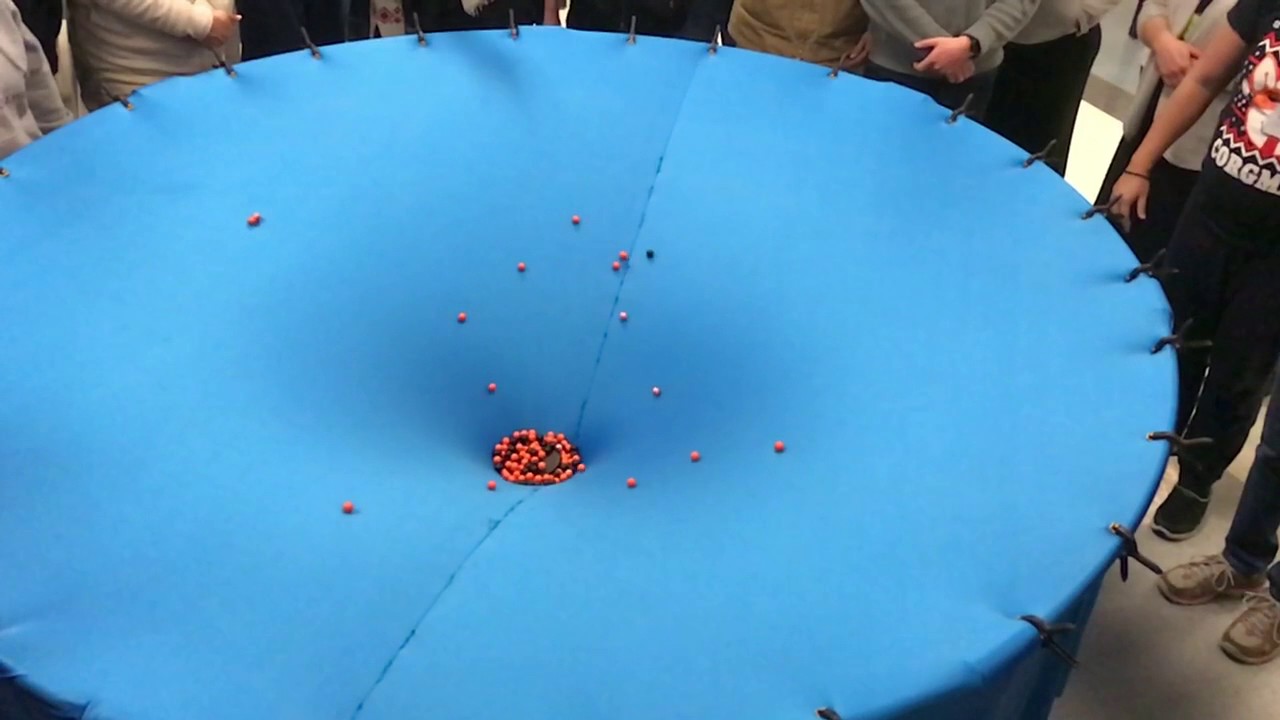
In this activity, students study how gravity functions in the solar system using a broadsheet, a pool ball, and marbles. Using a pool ball for the Sun and marbles for the planets, students test the gravitational force of the Sun's mass and attraction.
Learn more: Science Learning Hub
8. Maneuvers Using Gravity Assist
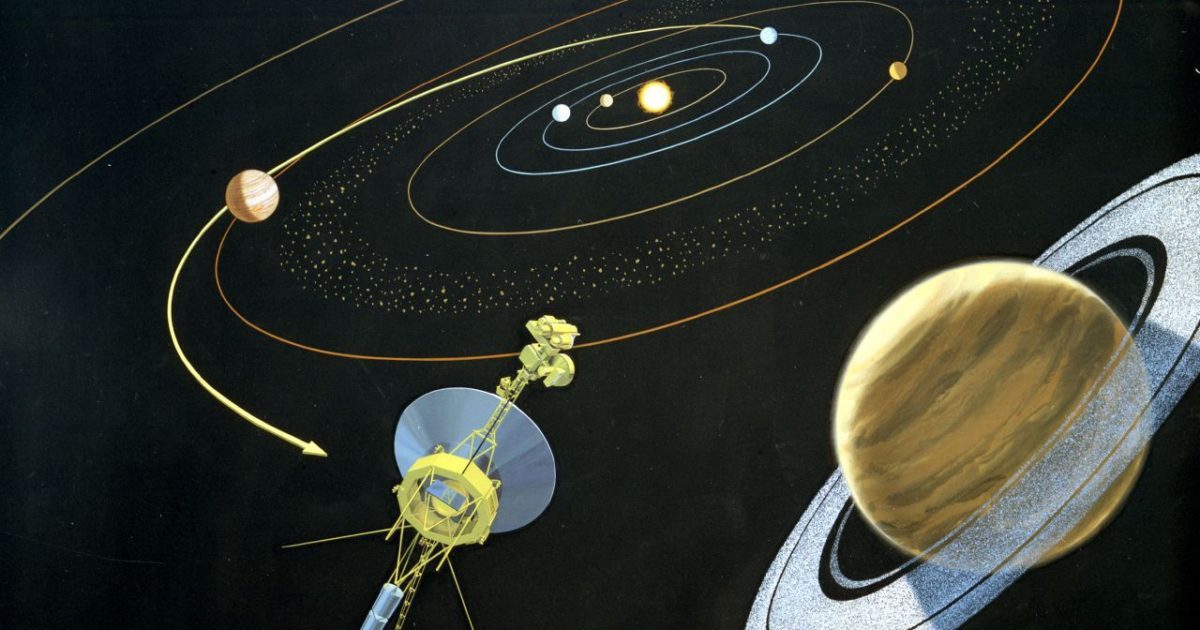
This lesson explores how a gravity assist or "slingshot" maneuver might help rockets reach faraway planets. Students study the elements contributing to a successful slingshot movement while simulating a planetary encounter using magnets and ball bearings.
Learn more: Science Learn
Chemical Energy
9. colors of fireworks.
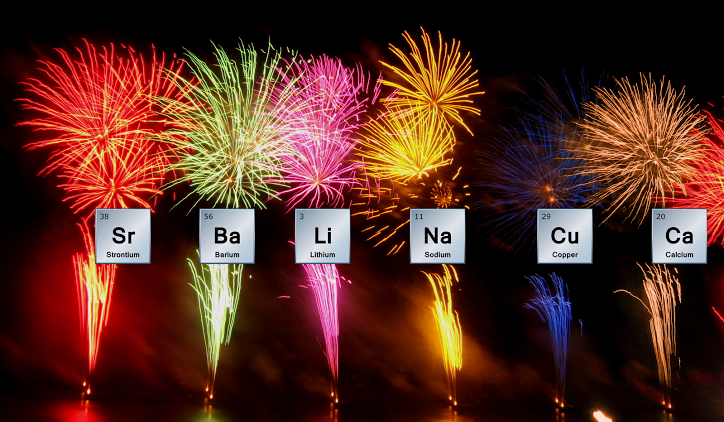
In this chemical energy lesson, students test how fireworks colors relate to chemicals and metal salts. Because of the chemical energy they generate, various chemicals and metal salts burn with varying light hues.
Learn more: ThoughtCo.
Light Energy
10. reflecting light off a cd.
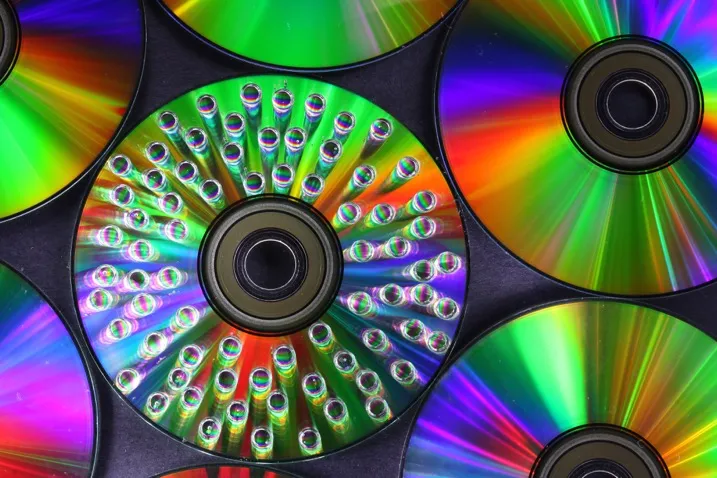
Ever wonder why CD light reflects a rainbow? Your kids probably have too. This project explains to kids why and how light energy works. It's a wonderful way to bring science outdoors.
Learn more: Twinkl
Nuclear Energy
11. observing nuclear energy in a cloud chamber.
This energy activity aims for students to construct and test a cloud chamber. A water- or alcohol-supersaturated vapor is present in a cloud chamber. Particles enter the cloud chamber as the atom's nucleus releases nuclear energy upon disintegration.
Learn more: Jefferson Lab
Kinetic Energy and Motion Energy
12. car safety during a crash.
Students explore techniques to prevent a toy automobile from crashing while studying Newton's law of conservation of energy. In order to design and construct an effective bumper, students must consider the toy car's speed and direction of motion energy just before impact.
Learn more: STEM Inventions
13. Creating a device for dropping eggs
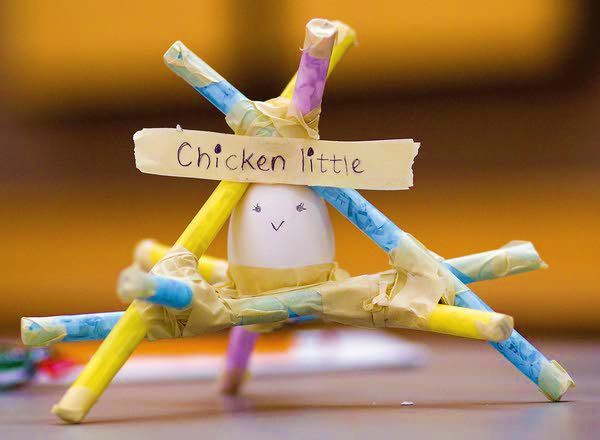
This motion energy activity aims to have students create a mechanism to cushion the impact of an egg being dropped from various heights. Although the egg drop experiment may teach potential & kinetic types of energy, and the law of conservation of energy, this lesson focuses on preventing the egg from shattering.
Learn more: Get Smart about STEAM
Solar Energy
14. solar pizza box oven.
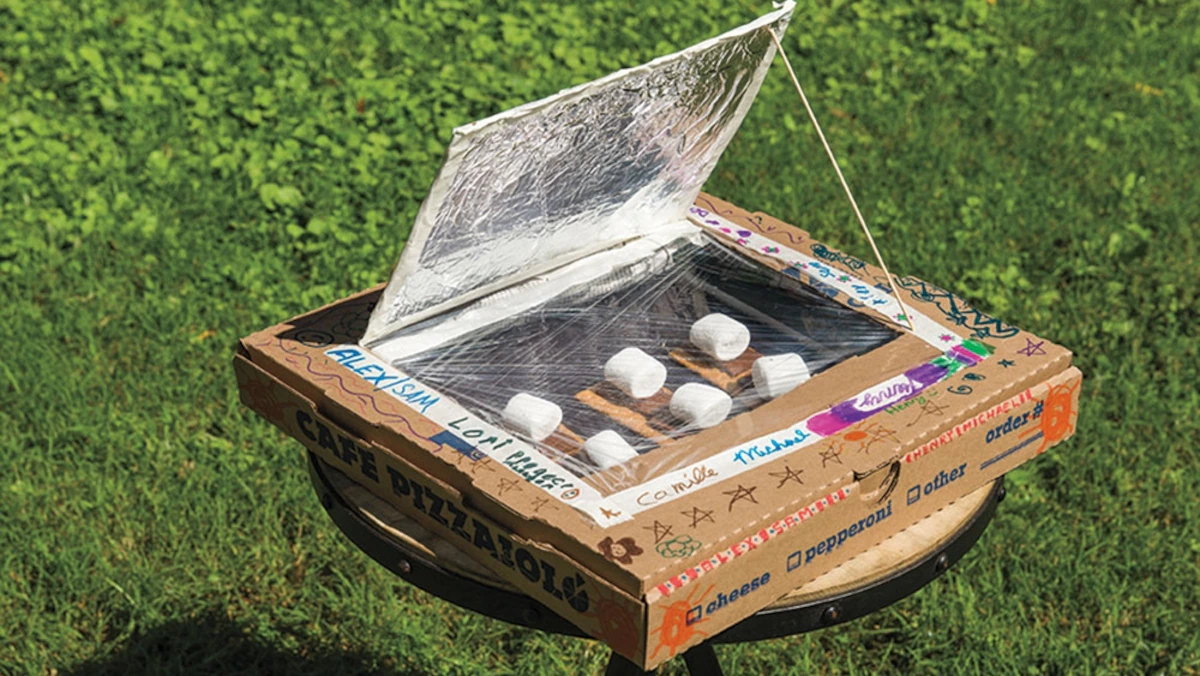
In this activity, kids use pizza boxes and plastic wrap to build a simple solar oven. By capturing the Sun's rays and transforming them into heat, a solar oven is able to prepare meals.
Learn more: Blendspace
15. Solar Updraft Tower
This project has students create a solar updraft tower out of paper and look into its potential for converting solar energy into motion. The top propeller will rotate when the device's air warms up.
Learn more: Walk with Easha!!
16. Do Different Colors Absorb Heat Better?
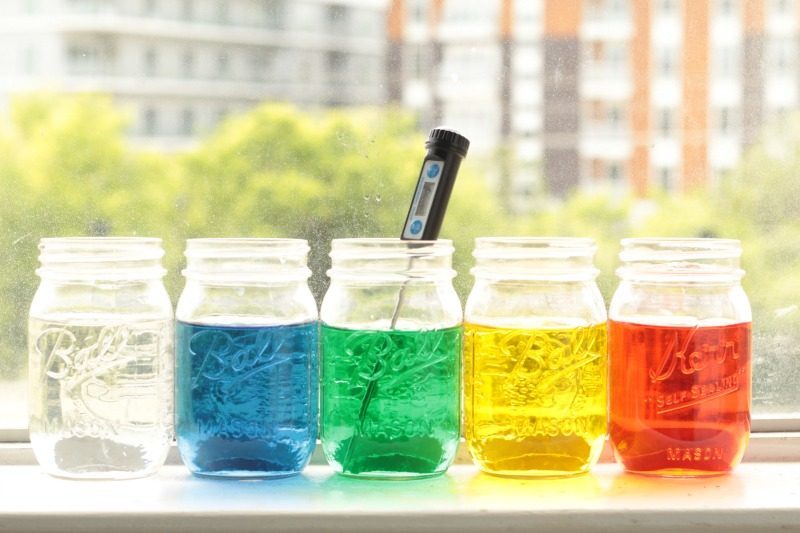
In this classic physics experiment, students investigate if the color of a substance impacts its thermal conductivity. White, yellow, red, and black paper boxes are used, and the order in which the ice cubes melt in the sun is predicted. In this way, they can determine the sequence of events that caused the ice cubes to melt.
Learn more: Teach Engineering
Heat Energy
17. homemade thermometer.
Students create basic liquid thermometers in this classic physics experiment to examine how a thermometer is made using the thermal expansion of liquids.
Learn more: Yuri Ostr
18. Heat-curling metal
Within the context of this activity, students investigate the relationship between temperature and the expansion of various metals. Students will see that strips produced from two materials behave differently when set over a lit candle.
Learn more: Science Buddies

19. Hot air in a balloon
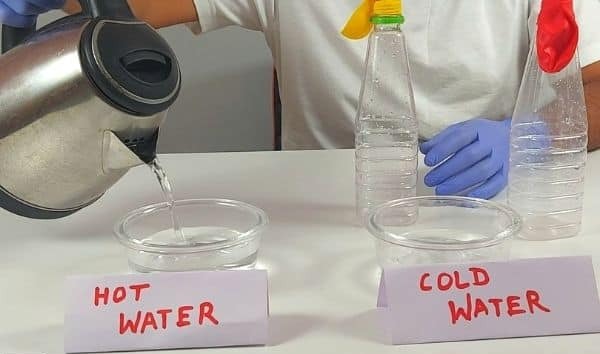
This experiment is the best way to show how thermal energy affects air. A tiny glass bottle, a balloon, a big plastic beaker, and access to hot water are required for this. Pulling the balloon over the bottle's rim should be your first step. After inserting the bottle into the beaker, fill it with hot water so that it surrounds the bottle. The balloon begins to expand as the water gets hotter.
Learn more: Go Science Girls
20. Heat conduction experiment
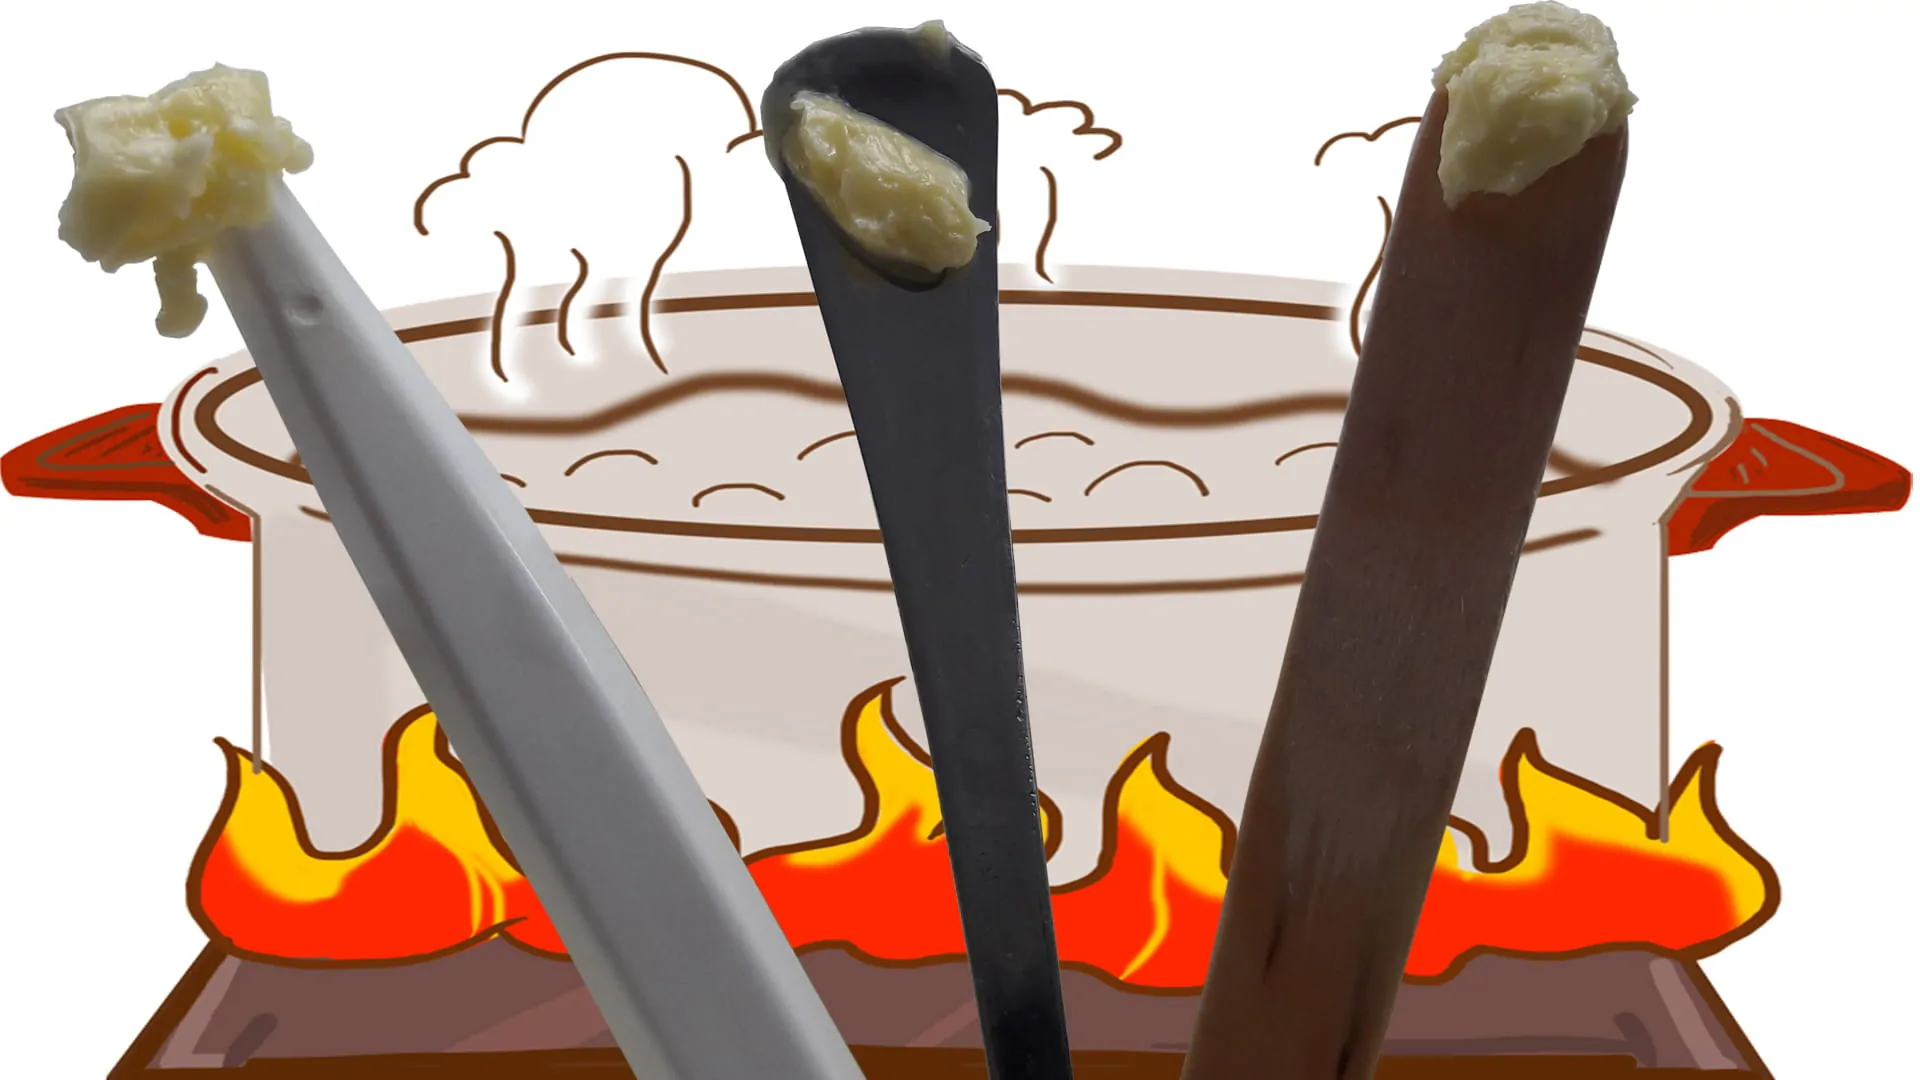
Which substances are most effective in transferring thermal energy? In this experiment, you will compare how different materials can carry heat. You'll need a cup, butter, some sequins, a metal spoon, a wooden spoon, a plastic spoon, these materials, and access to boiling water to complete this experiment.
Learn more: STEM Little Explorers
Sound Energy
21. rubber band guitar.
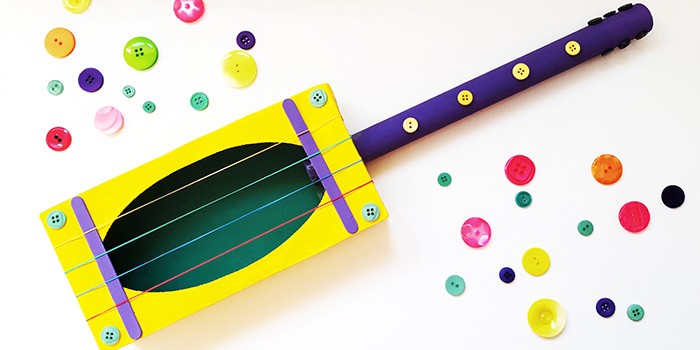
In this lesson, students construct a basic guitar from a recyclable box and elastic bands and investigate how vibrations produce sound energy. When a rubber band string is pulled, it vibrates, causing air molecules to move. This generates sound energy, which is heard by the ear and recognized as sound by the brain.
Learn more: Wiki How
22. Dancing Sprinkles
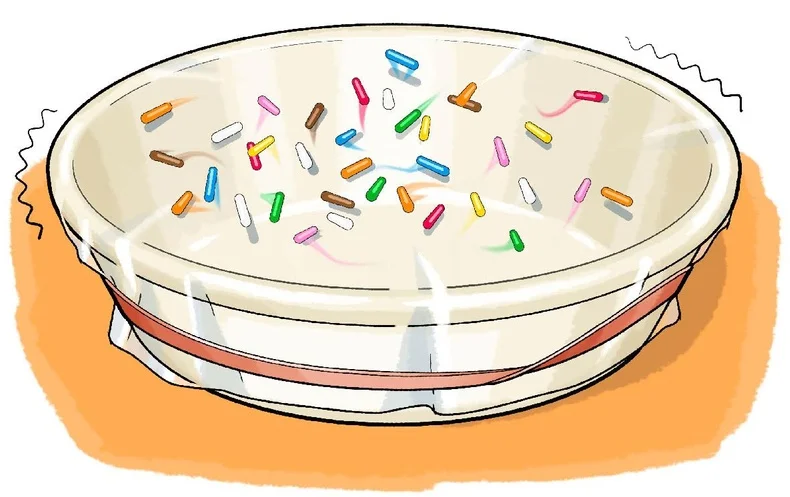
Students learn in this lesson that sound energy may cause vibrations. Using a plastic-covered dish and candy sprinkles, students will hum and observe what happens to the sprinkles. After conducting this investigation, they can explain why sprinkles react to sound by jumping and bouncing.
23. Paper cup and string
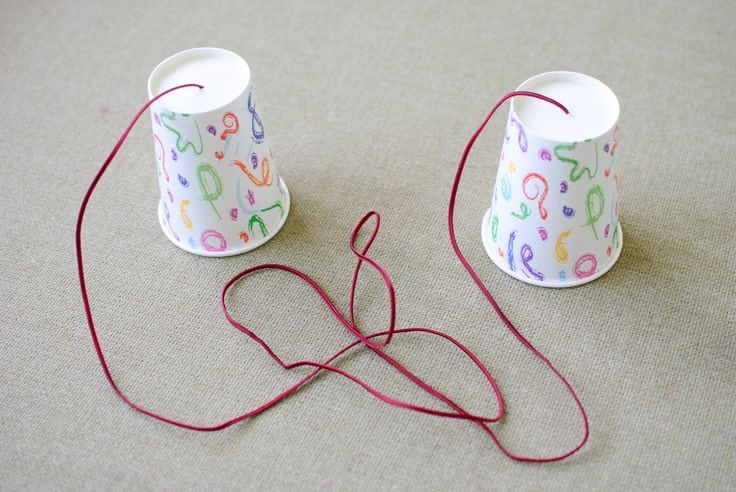
Your kids should be accustomed to engaging in activities like this sound experiment. It's a great, entertaining, and straightforward scientific idea showing how sound waves may pass through things. You only need some twine and some paper cups.
Learn more: Global Call Forwarding
Electrical Energy
24. coin-powered battery.
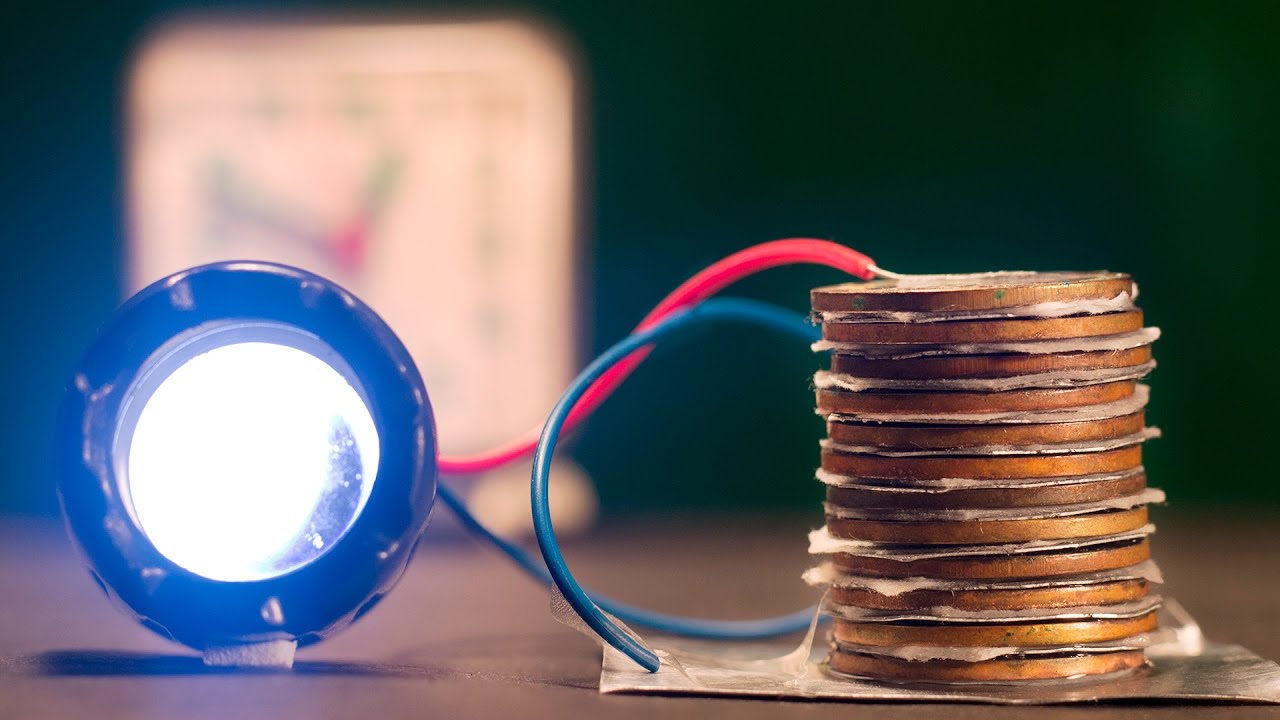
Can a pile of coins generate electrical energy? Within the context of this activity, students make their own batteries using a few pennies, and vinegar. They get to study electrodes as well as the movement of charged particles from one metal to another through electrolytes.
Learn more: Generation Genius
25. Electric Play Dough
Students gain background knowledge on circuits in this lesson using conductive dough and insulating dough. Kids build basic "squishy" circuits using the two types of dough that light an LED so they can observe firsthand what occurs when a circuit is open or closed.
Learn more: The Dad Lab
26. Conductors and insulators
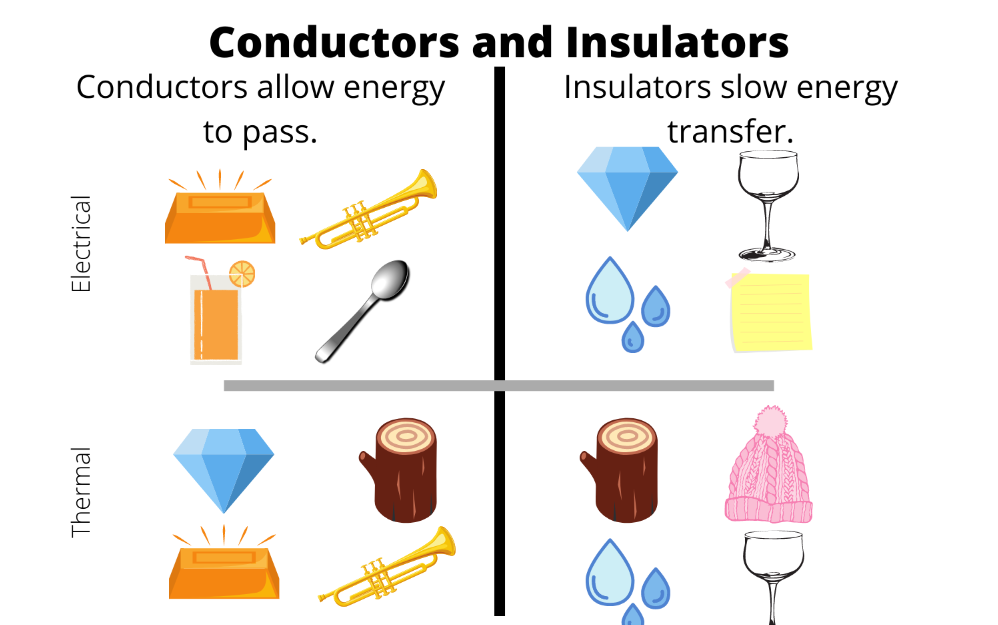
Your kids will love using this worksheet on conductors and insulators to explore how electrical energy may travel through various materials. The document includes a list of several materials, all of which you should be able to acquire quickly. Your pupils must guess whether each of these substances will be an insulator that doesn't carry an electric form of energy or a conductor of electricity.
Learn more: Science Notes
Potential and Kinetic Energy Combined
27. paper roller coaster.
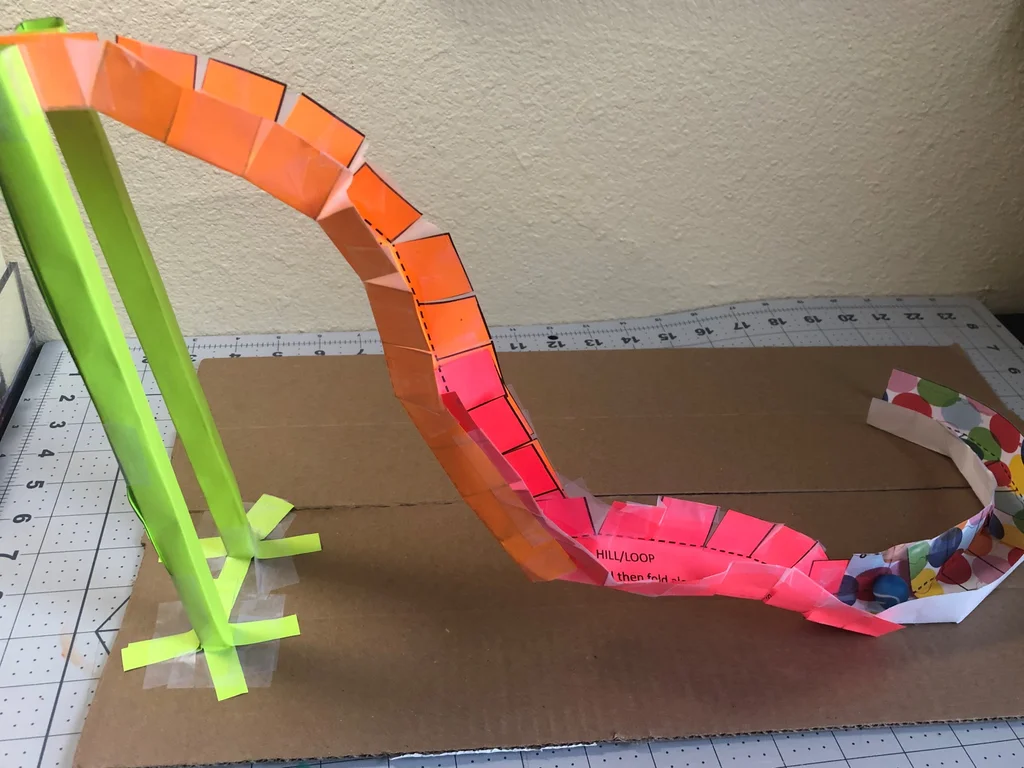
In this lesson, students construct paper roller coasters and try out adding loops to see if they can. The marble in the roller coaster contains potential energy and kinetic energy at different locations, such as at the summit of a slope. The stone rolls down a slope with kinetic energy.
Learn more: Instructables
28. Bouncing a Basketball

Basketballs have potential energy when they are first dribbled, which is transformed into kinetic energy once the ball hits the ground. When the ball collides with anything, part of the kinetic energy is lost; as a result, when the ball bounces back up, it is unable to achieve the height it had reached before.
Learn more: Research Gate
- Sign in / Register
- Administration
- My Bookmarks
- My Contributions
- Activity Review
- Edit profile
The PhET website does not support your browser. We recommend using the latest version of Chrome, Firefox, Safari, or Edge.

ENERGY TRANSFORMATION LESSON PLAN – A COMPLETE SCIENCE LESSON USING THE 5E METHOD OF INSTRUCTION
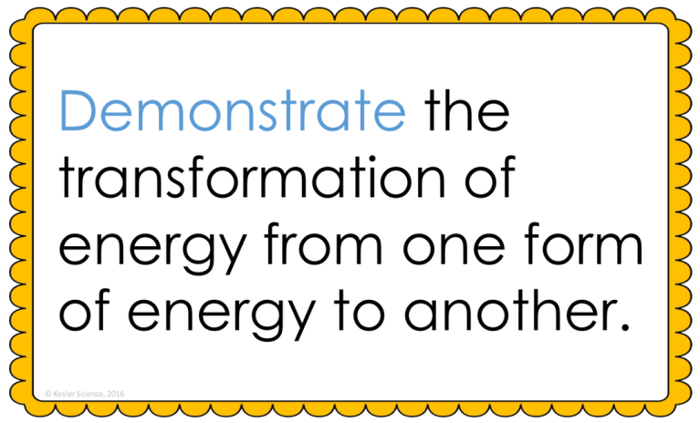
At the end of this energy transformations lesson plan, students will be able to demonstrate the transformation of energy from one form of energy to another. Each lesson is designed using the 5E method of instruction to ensure maximum comprehension by the students.
The following post will walk you through each of the steps and activities from the energy transformations lesson plan.
Objective Introduction
At the beginning of the lesson, the class will do a Think-Pair-Share to discuss the objective.
Class Activity
- Tell students that today they will be learning about energy transformations.
- Demonstrate to the class your "Tiny Dancer" or motor.
- Ask the students to brainstorm all the different forms of energy they observe in the "Tiny Dancer".
- Hopefully, they will come up with battery (chemical), motion (kinetic).
Student Activity
- Explain that energy can be transformed from one form to another.
- Show the students the objects you collected from the classroom.
- Ask students to make a list of energy transformation for each object.
The teacher will help to clear any misconceptions about energy transformations. A major misconception is that students think that energy is just used up and not transformed.
Estimated Class Time for the Engagement: 20-30 minutes

EXPLORATION
This student-centered station lab is set up so students can begin to explore energy transformations. Four of the stations are considered input stations where students are learning new information about energy transformations and four of the stations are output stations where students will be demonstrating their mastery of the input stations. Each of the stations is differentiated to challenge students using a different learning style. You can read more about how I set up the station labs here .
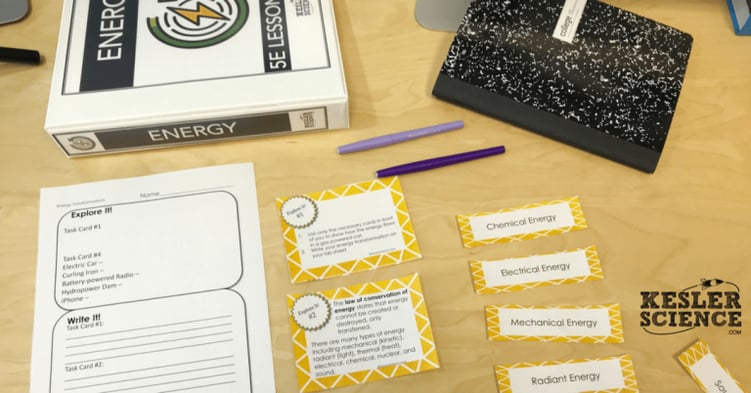
EXPLORE IT!
Students will be working in pairs to better understand energy transformations. In this station, students interact with labels as they try to identify the types of energy transformed. Students will follow the steps and record their observations on their lab sheet.
WATCH IT!
At this station, students will be watching a short video explaining energy transformations. Students will then answer questions related to the video and record their answers on their lab station sheet. For example: List 6 different types of energy that are found in the video. List 4 different energy transformation examples from the video.
RESEARCH IT!
The research station will allow students to explore an interactive web page that helps them understand energy transformations. Students will be instructed to complete a few tasks and record answers on their lab sheets.
READ IT!
This station will provide students with a one page reading about energy transformations. There are 4 follow-up questions that the students will answer to show reading comprehension of the subject.
ASSESS IT!
The assess it station is where students will go to prove mastery over the concepts they learned in the lab. The questions are set up in a standardized format with multiple choice answers. Some questions include: What is the correct energy transformation in a flashlight? What is the correct energy transformation in a hot air balloon? What is the correct energy transformation in a hydropower dam? Which energy type is missing from the solar panel?
WRITE IT!
Students who can answer open-ended questions about the lab truly understand the concepts that are being taught. At this station, the students will be answering three task cards: Describe the energy transformation in a windmill. What does the law of conservation of energy state? Provide an example of a household item and describe the energy transformations that it undergoes.
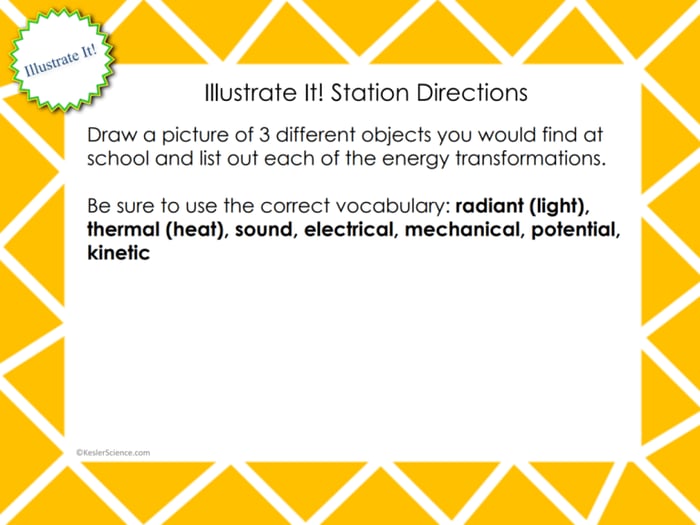
ILLUSTRATE IT!
Your visual students will love this station. Students are to draw pictures that demonstrate their knowledge of energy transformations.
ORGANIZE IT!
Students at this station will match the sets of cards. Cards include objects and energy transformations that the students will work to determine which would be a match. Once students have completed their organization, the teacher will check their understanding.
Estimated Class Time for the Exploration: 1-2, 45 minute class periods
EXPLANATION
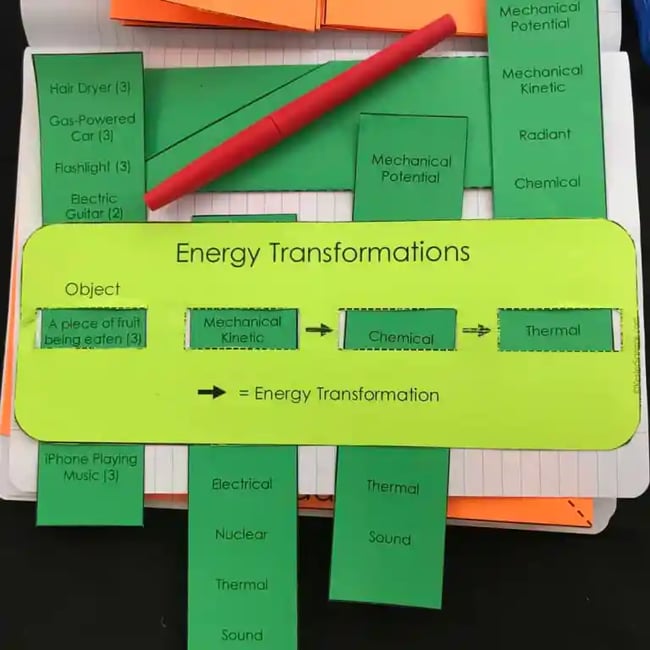
The explanation activities will become much more engaging for the class once they have completed the exploration station lab. During the explanation piece, the teacher will be clearing up any misconceptions about energy transformation with an interactive PowerPoint, anchor charts, and notes. The energy transformation lesson includes a PowerPoint with activities scattered throughout to keep the students engaged.
The students will also be interacting with their journals while taking notes from the PowerPoint. If you have students that need modified notes, the 5E lessons come equipped to help give every student access to the lesson.
Estimated Class Time for the Exploration: 2-3, 45 minute class periods
ELABORATION
The elaboration section of the 5E method of instruction is intended to give students choice on how they can prove mastery of the concept. When students are given choice the ‘buy-in’ is much greater than when the teacher tells them the project they will have to create. The elaboration project will allow students to create a transformation table, scavenger hunt, solar oven, drawing of an energy transformation machine, sound experiment, Lego circuit board, Rube Goldberg machine, or a heat demonstration. Estimated Class Time for the Elaboration: 2-3, 45 minute class periods (can also be used as an at-home project)
The final piece of the 5E model is to evaluate student comprehension. Included in every 5E lesson is a homework assignment, assessment, and modified assessment. Research has shown that homework needs to be meaningful and applicable to real-world activities in order to be effective. When possible, I like to give open-ended assessments to truly gauge the student’s comprehension.
Estimated Class Time for the Elaboration: 1, 45 minute class period
DOWNLOAD THE FULL LESSON NOW
The full lesson is available for download from my TpT store . Save yourself a ton of time and grab it now.
Download Over $100 in FREE Resources For Middle School Science
Simply create a login below and gain immediate access to a selection of our Kesler Science product line worth $100 - for FREE. There's a full version of every product type! You'll also join tens of thousands of middle school science teachers who receive timely tips and strategies straight to their inbox.
Life Science Lessons Ecosystems & Ecology, Structure of Life, and Body Systems

Earth Science Lessons Earth Science, Space Science, and Weather

Physical Science Lessons Chemistry, Energy, and Force & Motion

Teaching Strategies & Ideas Middle School Science Strategies & Ideas
Rethinking Energy Transformation Labs
This lab allows teachers to differentiate instruction as students build a working conveyor belt to test how energy transfer works.
Your content has been saved!

Students constantly experience the effects of different types of energy transformations. They make use of power plants converting chemical energy into electrical energy every time they plug in their cell phones, for example. So they should understand where that energy comes from and how it is transformed into work and power.
My state is transitioning to the Next Generation Science Standards, which emphasize engineering design and hands-on, student-driven experiences, and I wanted to use that transition to rethink how I teach energy transformation. This project has high school physics students design a conveyor belt to study how energy transfers.
Rethinking my Unit on Energy
One of the easiest ways for students to stop learning is to make a science lab not only one that is no longer fun but also one in which some students cannot participate. My previous lab had students run up and down stairs to calculate their work and power and compare them to their lab partners’ work and power. This demonstrated the formula “work = force x distance.” To do the calculations, students had to share their weight, since that is really the force acting on the person as they climb the stairs.
Many students loved this lab, but others were put off because they were not physically capable of walking or running up the stairs. Others struggled with body image issues, and still others simply did not find the exercise to be relatable. As soon as students stopped engaging with the material, they were no longer invested in the concepts. Redesigning this lab gave me an opportunity to think about teaching physics from an equity perspective as well.
The Conveyor Belt Lab
The setup: The new lab introduces students to patents by first looking at the pictures included in the patent for Amazon’s robotic conveyor belt on wheels . Students are asked to identify the object they are looking at in the pictures, but they do not have any description of the conveyor belt or what it does. They also have not been introduced to patents or the patent process before this lesson.
Once students have brainstormed what they think the device is, we discuss the patent process and along the way reveal the true nature of the diagrams they were shown in the patent. Then students analyze the energy transformations that happen as the conveyor belt moves a package from one part of the belt to the end when it drops the package off into a package chute. This allows students to connect the relationship that work and power have to energy transformations.
As an extension, students are asked to consider the energy transformations of a package traveling from one warehouse to an airplane that goes to another warehouse, and then to a truck that takes the package to the recipient’s house . This part of the energy puzzle allows students to discuss with each other and create energy models on whiteboards that reveal the impact of transporting goods across large distances on the environment and what types of changes to the process might be considered.
The product: Students are tasked with designing and creating their own inclined working conveyor belt that makes a small package rise along its path. In general, students are given household items like cardboard, tubes, plastic bottles, barbecue skewers, tape, and paper. As students actively engage in the lab, they experience productive struggle as they go through the engineering process, where they are often first unsuccessful and then eventually create a working product. Once the students create the conveyor belt, they analyze the work and power of the package as it rises up the conveyor belt’s path.
The outcome: This lab can be differentiated depending upon the interests and needs of different students. Generally, students were given common household materials to build the conveyor belt with during class; however, one student asked to use Legos he had available and was able to build a much more complex conveyor belt. He is a student who often needs a challenge, so having the challenge of building a conveyor belt with gears that linked together encouraged him to dive deeply into the project. Other students who were familiar with robotics used equipment from the robotics team and developed their conveyor belt to work with an electrical switch, which also allowed them to learn more about different energy transformations.
The requirements for the conveyor belt can also be simplified so that the conveyor belt can be hand-cranked. One particular student who struggled with the calculations required in physics built a conveyor belt that was the best her class. She was able to focus on the conceptual aspect of the project, which then allowed her to be proud of herself, and she was more willing to come back to the calculations and worked hard to master them. Another student asked, “Since I designed and built this conveyor belt, can I call myself an engineer?” Of course I said, “Yes!”
Future Equity in Engineering-Based Curriculum
When I finally got the idea to have students create the conveyor belt, I realized that not only was it allowing more students to feel comfortable in my classroom, but also I was creating a much more authentic experience for them that aligned with the new standards. My experience with the results that students came up with and the overall impact on student learning means that I will continue to develop these types of experiences for students in the future.
In my class, I often focus on offering students alternative assessments. I have a process for students to show their new understanding after a test that has gone wrong that allows them to show their new understanding in a variety of ways, including hands-on projects, because not everyone shows their understanding best on a multiple-choice test. Physics is a particularly difficult subject for some, and I want everyone to feel comfortable making mistakes and correcting them. For this lab, I emphasize the importance of productive struggle and alternative assessment. In the lab, students can self-differentiate and choose their comfort level in designing and building a conveyor belt.
By focusing on a working and moving conveyor belt, they were also motivated to keep going even when they were having difficulties because they could clearly see that this is an engineering problem that is very relevant to today’s society. Amazon is still improving upon the design of the conveyor belt, after all. In fact, because we focused on a company that all or nearly all of the families in the class used on a weekly or monthly basis, and they developed their ability to be successful in such a challenge, they were able to see themselves as engineers.

IMAGES
VIDEO
COMMENTS
Use these free STEM lessons and activities to help students get hands-on building, testing, and exploring the science of energy and the different types of potential and kinetic energy.
Explore the mechanics of energy, how objects store energy, how objects use energy when moving, and how it is sometimes changed to other forms. Do a hands-on experiment to measure how energy changes its form.
Energy transfer and transformations are so much fun to teach! There are so many examples of energy transfers and transformations in our daily life that it’s easy to relay to students. We see it when we turn on a light switch, when we see an ice cube melt, and even when we eat a slice of pizza!
These activities and NGSS-aligned lesson plans help educators create hands-on learning opportunities to teach about potential and kinetic energy in the classroom, as part of remote learning, or for independent or family exploration at home.
Using experiments, you may genuinely involve your kids in understanding various types of energy. It allows learners to engage and participate in the course, adding an interactive component. 1. Rubber Band Stretching. Rubber bands are great illustrators of elastic energy because of their extensibility.
Track and visualize how energy flows and changes through your system. Explore how heating and cooling iron, brick, water, and olive oil adds or removes energy. See how energy is transferred between objects.
This hands-on science experiment uses something kids love (marbles!) to show how energy is transferred from one object to another.
Explain that energy can be transformed from one form to another. Show the students the objects you collected from the classroom. Ask students to make a list of energy transformation for each object. The teacher will help to clear any misconceptions about energy transformations.
Students constantly experience the effects of different types of energy transformations. They make use of power plants converting chemical energy into electrical energy every time they plug in their cell phones, for example. So they should understand where that energy comes from and how it is transformed into work and power.
These experiments provide further examples of energy being transferred between different energy stores.