

Growing Beans in the Classroom
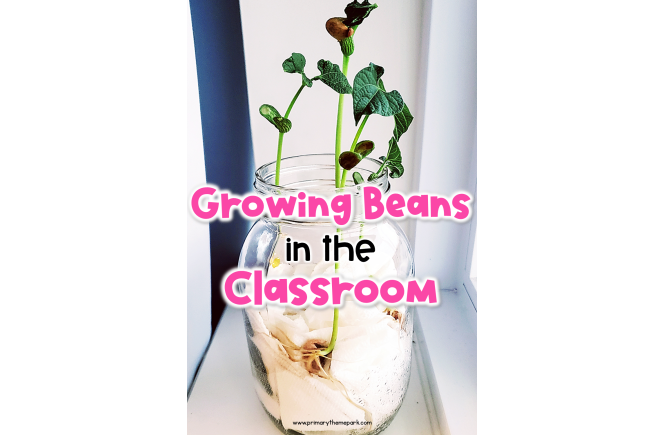
Nothing like setting up an experiment in the classroom and it not turning out exactly how you expected, right? Well, I’m here to share all my tips and tricks for growing beans in the classroom so your experiments are a success!
- dried beans (pole, bush, or lima beans)
- paper towels
- spray bottle of water
- clear glass jar or small clear plastic cup
My #1 Tip for Success
Before I go any further, I want to tell you the one thing I feel makes or breaks this experiment. It’s what will get you tall, lovely sprouts like the picture above in only ten days:
Soak the Beans in Water Overnight!
I can’t stress enough that you should soak the beans in water overnight beforehand. I’ve tried the experiment with and without soaking the beans. Soaking the beans boosts the germination process and you see roots in a day or two. Within ten days, the bean sprouts have a tall stem with leaves growing out of the top of the jar. When I’ve not presoaked the beans, it took five or six days for the first root to begin to emerge. Even then, the entire germination process seemed to go a lot slower.
Now that you’ve soaked your beans, let’s start the experiment!
- Fill the container about halfway with paper towels.
- Place several beans on the outside of the paper towels in the container so you can watch them grow.
- Spray the paper towels with water to dampen them.
- Place the container near a window or on a window ledge.
- Observe and watch the beans grow over the following days and weeks!
Can the Seeds Grow Without Soil?
We teach students that plants need water, air, sunlight and soil to grow. Some students may wonder how these seeds will grow without soil. It might be helpful to point out that you can germinate seeds, or help them start to grow, without soil. Why? It’s because the food the seed needs to start growing is inside the seed. The seed provides food for a short time and then you must plant the seedling in soil for it to continue to grow.
Experiment Variations
This experiment helps students learn the basic needs of seeds and plants. What happens if they don’t get what they need?
Prepare a few extra jars with beans and alter some of their growing conditions. Observe what happens.
- No water : Don’t soak the beans in water overnight or wet the paper towels in the container.
- No air : Use a sandwich bag for this one. Use a straw to suck as much air from the bag as possible before zipping it shut.
- No sunlight : Place the jars away from windows or even in a dark space like a cabinet.
- Not enough space : Place seeds in a group touching each other.
- No soil : Seeds will germinate without soil, but will they keep growing and produce fruit (beans) if left in the container with no soil? This will take a lot longer to observe. Another option is to plant the beans in sand. Give them water and sunlight, and observe what happens.
Growing Beans FAQs
What beans did you use? I used pole and lima beans. I’ve successfully germinated both kinds.
Do I need beans from a seed packet or can I used dried beans from the grocery store? While you may certainly use a purchased seed packet of beans, I’ve always had success germinating and sprouting dried beans I’ve brought at the grocery store. I recommend soaking and germinating a couple of dried beans at home to make sure your dried beans will work before doing it with your students.
How long will it take to see anything? One or two days if you soak the beans overnight, five or six days if you don’t soak them. I soaked my beans overnight and put them in a jar and baggie. The very next day I already saw the root coming out of most of the beans.
Can I do this experiment anytime of year? I think so! I live in the Midwest and germinated these seeds towards the end of January! Even though it was cold outside and the windows themselves felt cold, there was enough sunlight and warmth to begin germination. If you want to keep the plants alive or transfer them into a garden, you will need to begin germination closer to actual planting time.
What if the paper towels get dry? Use a spray bottle of water to moisten the paper towels if you feel they are too dry.
Can I germinate beans in a sandwich bag? Absolutely! Just place a damp paper towel and several beans in a zip-top sandwich bag and seal it. Then tape or place the bag on or near a window and watch them grow!
Students learn so much about plants by growing beans in the classroom. It’s really fun to watch the little beans grow so quickly. Sometimes there’s a huge difference from day to day. I hope these tricks and tips help you and your students become expert germinators!
More Plant Resources
Parts of a Plant Lollipop Activity
Parts of a Plant Painting
Plant Videos for Kids
Plant Unit for Kindergarten and First Grade
29 Comments
I really enjoy to see the plant growing.
hi this is cool info
Hey there! I am soaking my Lima beans to grow in our classroom and I noticed they are wrinkling and some of them are splitting. Is this normal? Thanks so much for your info! We’re excited to try it!
That’s a great question! The wrinkles are completely normal. As for splitting, when the inside of the bean rehydrates quicker than the outside, the bean will split. It happens sometimes. You can have students examine the split beans to see what’s inside the seed. Good luck and I hope your students enjoy growing their beans!
Hi, I’m a PreK teacher and have found the past several years, that the beans get moldy in the children’s ziplock bags. How can I avoid the mold?
That’s a great question! I might try doing it with glass jars instead of baggies. I’ve never had an issue with mold when growing them in glass jars like I shared in the blog post. I also leave the lid off to allow air circulation.
If you need to use bags, you might try leaving the top open or making a few holes near the top of the zipped bag. Another idea is to only leave the beans in the bags for just a few days and plant them as soon as you can.
I hope these ideas help! Good luck!
Hi Cara! Two easy tricks are 1) spritz rather than soak the towels in water 2) staple a horizontal row of staples about two inches down the bag and place lima beans along the staples before sealing. Veteran teacher tip—best of luck!
They need to wash their hands thoroughly before “planting”.
When do you put the bean in soil?
Hi! I plant them as soon they look like the one pictured with roots, stem, and a few leaves. They shoot up very quickly, so it’s not long before they’re ready to be planted.
Now that my granddaughter brought home her bean,what do we do with? A single plant. Does it need something to climb? Or will it get bushy? We weren’t given any follow up info sadly. HELP
That’s a great question! If you can find out what kind of bean it is, that would be helpful. Some beans are runners and need to be staked or have something to climb, while others don’t. Other than that, just plant it in soil and watch it grow!
I tried this experiment with my class and we have a few moldy plants. We wet the paper towel again every day. Does this mean the plants are dead?
Hi! If you do this experiment again, I suggest just lightly spraying the paper towel with water whenever it feels dry instead of watering them each day. If you soak the beans beforehand, they already have a good bit of water inside them. I also take the top off of the jar after they begin sprouting so air can circulate. Hopefully, doing those two things will stop the mold problem. Good luck!
Suggestions on the bean plant being towering over the cup? Do I need to get dowel rods? I feel bad because my kids are taking them home and I wanted them to be successful .
That’s a great question! Even though the plants stick up over the cup, they’re usually sturdy enough to send home. If you want to give them extra support, you might stick a straw in the cup and gently tie the plant to it. I hope your students have a great experience sprouting seeds!
hi im in 5th grade and when i grow up i will show my children this and might do this for their birthdays
If the seeds have mold, does that mean they are dead? Or can I salvage them?
Additionally, how do I safely transfer them to plant so that students can take home? Do I need a certain type of soil? A pot?
Hi, Alex! Those are great questions. First, if your seeds have mold, I would throw them out and start over. When you try again, here are my tips to avoid mold:
1. Just lightly spray the paper towel with water whenever it feels dry. If you soak the beans beforehand, they already have a good bit of water inside them so they don’t need lots of water. Too much water in the jar or bag will allow mold to grow.
2. Take the top off of the jar after they begin sprouting so air can circulate. If you use zip-top bags, open the bags after the beans sprout.
3. Avoid direct sunlight for long periods. Too much heat inside the jar or bag will cause mold to grow. The beans will still sprout near a window with indirect sunlight.
If you want to plant them for students to take home, use potting soil (not garden soil) and any small plastic container like yogurt cups, bottom half of a water bottle, or other small plastic cups you might have in your recycling bin.
I hope those ideas help! Good luck!
Will pinto beans grow?
Hi, Maria! I’m so sorry I’m just seeing your question! I’m not getting emails when someone posts a comment like I usually do, and I’m not sure why. I haven’t tried pinto beans because I’ve read they don’t sprout as reliably as other beans. It might be interesting for kids to try to grow pinto beans along with other types of beans to see which ones sprout the best.
I have jars without lids. Do I need lids to begin this process?
That’s a great question! You don’t need lids to begin the process. You might put plastic wrap or aluminum foil over the jar for the first few days. I think it’d be interesting for kids to observe a covered jar and one that isn’t. Then, they can see if covering the jar affects growth.
This activity is perfect for children who love to explore what is in store for them in the real world. Thank you so much for sharing this.
- Pingback: Parts of a Plant Craft - Primary Theme Park
- Pingback: Parts of a Plant Activity - Primary Theme Park
- Pingback: Plant Videos for Students - Primary Theme Park
- Pingback: Hurry Up and Wait….. – Lacey’s Learning Log
- Pingback: 25 Fun and Engaging Plant Life Cycle Activities for Kids - Teaching Expertise
Leave a Reply Cancel reply
Your email address will not be published. Required fields are marked *

Bean Plant Experiment for Kids
With spring in the air and gardening a great homeschool activity, I thought a fun experiment was appropriate. Why not have fun in your homeschool & encourage a love of learning with the Bean Plant Experiment for Kids?
This is one of the easiest plant science projects you’ll ever do – the bean plant experiment for kids. When I taught public school, I did this every year with my science classes. All 30 kids had bean plants growing on our classroom windows.

One reason I love this project is it is so simple, but teaches so much about plants (root growth, plant growth, photosynthesis, and so forth)
If you are homeschooling, you probably have all the supplies at home right now. All it takes for each child is 4 pinto beans, 1 paper towel, 1 plastic baggie, 4 staples and some tape (forgot to include the tape:-)
Fold your paper towel in half. Fold it in half again. Insert the folded paper towel into the baggie. I like the fold & close baggies because it is lightweight and stays open at the top. You can use a ziploc if you like.
Place 4 staples along the bottom edge. Leave about 1″ from the edge to allow for the roots to grow.

Tape the baggie to the window. Be sure your child can reach the top to water the plant. If you have several kids, write their name on the baggie with a Sharpie.
Water your plant. You don’t want to drown your plant, but you do want your paper towel to be completely soaked. It’s okay to have a little water in the bottom of the baggie as you can see in the photo.


Free Video Mini Course

To help you get organized, I have a 3-part video course, called How to Simplify Your Homeschool. Although I could charge for this course, I’m giving it to you completely free. Just enter your name & email below.
Then, check your Inbox for your first lesson. Each day, I’ll email you a short video with a quick task to get started. You’ll also receive my How to Simplify Your Homeschool Workbook for free. Each video has a one-page task to get you started on the way to confidently homeschooling your children this year.
What spring projects are you doing this year? Post a comment. I will be giving away a copy of “Habitats for Birds: How to Create an Inviting Backyard for Birds” to 2 readers who post a comment this week. Or check out the Science Share & Tell

38 Comments
We walked past a preschool the other day, with a window full of baggies just like this one. I wonder how other seeds would do – I think it would be interesting for my older kids to try a few different seeds, and collect data on rates of germination, growth, etc.
Laurie, What a good idea. Pinto beans do well because you see growth almost immediately. I’ll post some updated photos.
This is such a great idea!
Glad you like it. I need to post follow up photos for the roots growing out of the bean.
Interested in the math problems nd science experiments and lnks. Thank you.
Joyce, Sorry for any confusion. There’s a box on the post where you can enter your email for the Spring Math & Science printable. It’s the fastest way to get them b/c they are automatically emailed to the email address you choose.
I would like the math problems and science experiment/ links. Regarding spring projects, we are putting in our garden. We are also making bird houses out of gourds we grew last year. Lastly, we are planning a 50th wedding anniversary celebration for my parents.
Janna, There’s a box on the post where you can enter your email for the Spring Math & Science printable. We still have the bird house that my kids made at Cousins Camp with my parents. I love it. I’ve never made a bird house from a gourd…cool! Enjoy the 50th celebration. My parents’ 50th was a few years ago. So much fun to see all their friends on one day.
- Pingback: Bean Plant Experiment for Kids - Update - How To Homeschool My Child
What a great idea to place the staples in the baggie to separate the roots from the beans. Never thought of that one before! Thanks!
The bean experiment is one of my faves. I like the idea of using the staple to hold up the bean! Why didn’t I think of that? lol! The daily journal is a great idea, too. We’ll have to add that to our lesson plan.
I’m also looking for tips to improve our experiments. Feel free to share any other ideas you have.
I’m planning on doing it with my kids next week. Question, why tape it to the window? Cause of the light? Since it’s January it’s kinda cold outside, I’m afraid if I put it next to the window the roots won’t grow…any ideas? thanks!
Karla, I taped it to the window for light and so the kids can easily see the roots & stem growing. You might try a 2nd experiment. Tape one to the window and another somewhere else in the house. See if there is a difference.
Will try it and see the difference 🙂 thanks! They are going to love it!
I love this! It’s so easy to put together, and my son is excited to see what comes of it.
Dumb question, but how often should we be watering them? I just did this with my son, and realized I have no idea when we should water them next. I’m horrible with plants, and would hate to kill his science experient. :/
Penelope, We watered the beans when the paper towel started to dry out. If you see it is dry, water immediately 🙂 Good luck!
I forgot to say…you don’t want to overwater. You don’t want water leaking out the bottom every day, so it’s ok for the paper towel to dry a bit.
Perfect. Thanks for answering! We’ll keep watching the paper towel. 🙂
Question: Do we have to use pinto beans or will any do?
I’m not sure. I would think any bean would do since they come from plants. That would be an interesting experiment to try different beans.
We used black beans in our experiment 🙂
Thanks for sharing what you did. Good to know you can use different types of beans.
Thanks, y’all! I think we’ll try several different beans. Thanks for the idea!
What a neat experiment. This will definitely be added to the bean unit I’m putting together. Thanks!
this is such a great idea!!! I recall doing this as a kid! I can’t wait to try it with my class!!
Does it work with any kind of beans?
I tend to have pinto beans, so that’s what I’ve always used. My guess is it works with any type of bean.
I was wondering if you could tell me how you placed the pretty green direction letters with the vine design onto the baggies. and/or where did you purchase them? thank-you! Nanette Special education teacher
Sorry I’ve been out of town & catching up.
I used “cheap” baggies (fold over sandwich bags). Then I placed the beans above staplers so the vine grows up the baggie. See the images on this post.
How did you keep the beans in position?
I place a staple about 1 inch from the bag bottom. Then place the bean on top of each of the 4 staples. Take a look at the photos above.
Sounds like a silly question, but what do you do with the beans after they have sprouted and have roots?? If I plant will they grow bean plants or just a regular plant?
It’s not a silly question. You can plan the beans in a container or in the ground, but I don’t think they will produce anything. It will be a regular plant.
When I was in 5th, we used Lima Beans. Another teacher used pintos, and some used other various beans.
I used pinto beans when I taught 5th grade, but I think all can work fine.
Please send me the Spring Math Problems and Plant Science Experiment & Links! Looking forward to trying the bean experiment! Thank you!
These types of homeschool projects are always so great to do in spring. Thanks for the tips.
Leave a Reply Cancel reply
Your email address will not be published. Required fields are marked *
Save my name, email, and website in this browser for the next time I comment.


- Chinese New Year
- Girls’ Day (Hinamatsuri)
- St. Patrick’s Day
- Thanksgiving
- Paper Plate Crafts
- Early Math Worksheets
- Coloring Pages
- Stage 1 Baby Food Purees
- Stage 2 Baby Food Purees and Mashes
- Healthy Baby, Toddler & Kids Food
- Sauces & Dips
- Soups and Stews
- Pastas and Noodles
- Smoothies – Smoothie Bowls – Etc
Kid Science: Grow Beans in a Bag with Free Printable
Please share!
As an Amazon Associate, I earn from qualifying purchases. This post may contain affiliate links. Read my disclosure policy.
Growing beans in a bag is an activity I remember doing when I was in school, so I thought it would be fun to do it with my son. He loved seeing the beans grow, and checked them daily to see if there were any changes!
This is such a great way for your kids to watch the process of how a plant grows. It’s something that we normally don’t get to see, since it usually happens while buried in soil.
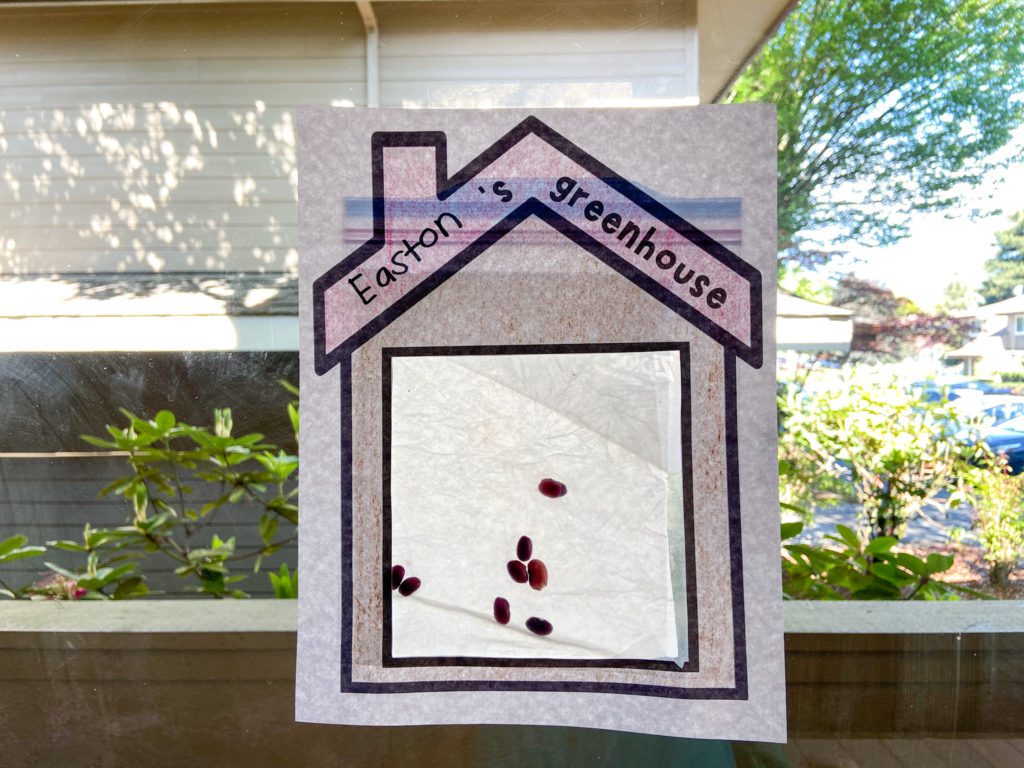
All you need is a plastic bag, paper towel, beans, and this (optional) free printable, and you can grow beans in a bag too!
What kind of beans can I use?
Lima beans and pinto beans will grow the fastest, but any dried beans that you already have at home will work.
Jack and the Beanstalk
For toddlers and preschoolers, a fun activity would be to read the book Jack and the Beanstalk , and then to grow these “magic beans” in a bag. The kids will be excited to see the beanstalks shoot up!

How do you grow beans in a bag?
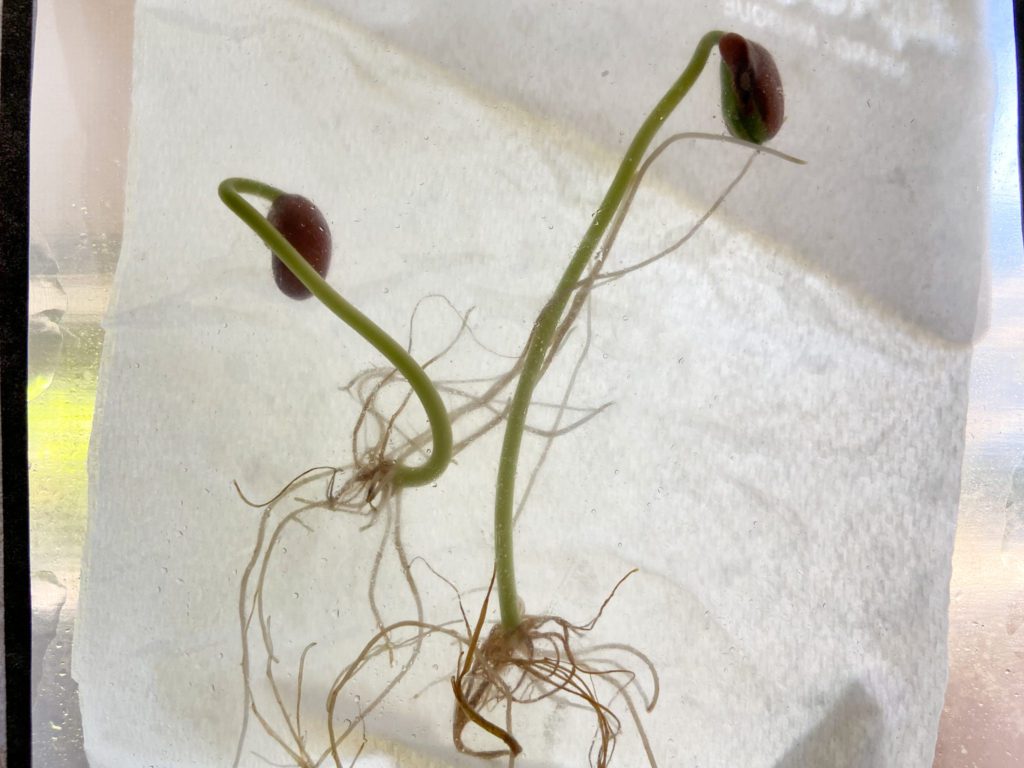
- dried beans
- paper towel
- free printable
- markers/crayons
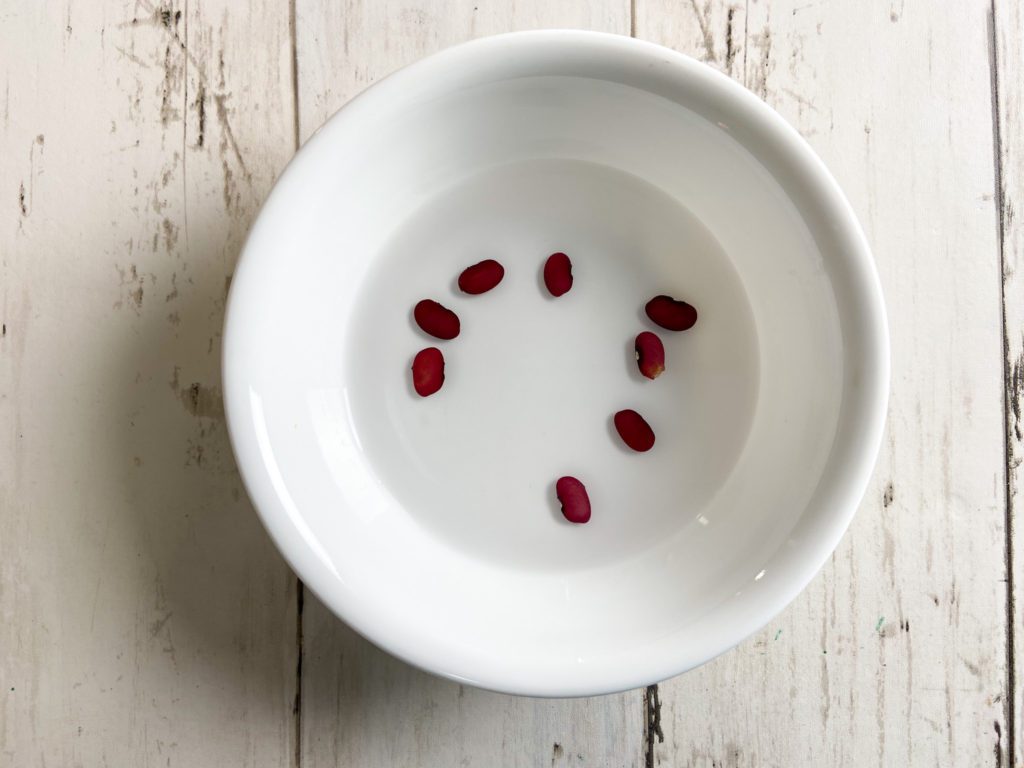
Step 1: Soak your beans overnight. This step is optional, but it will make your beans grow faster.
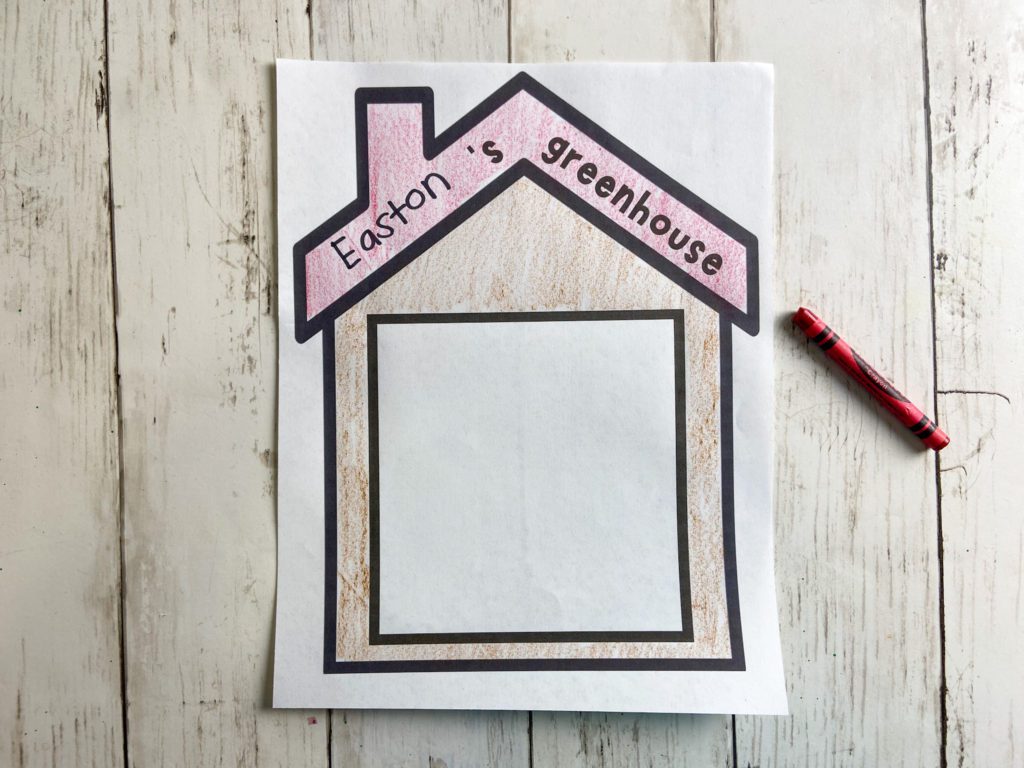
Step 2: Color the free printable, then cut out the square in the middle.
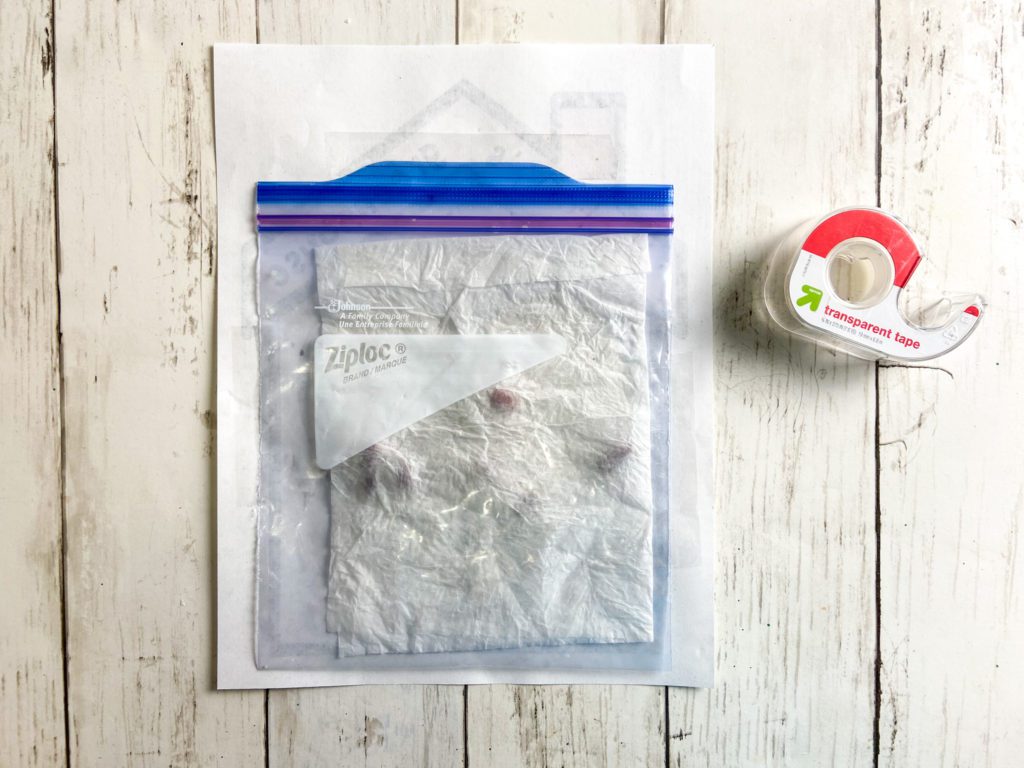
Step 3: Slightly wet a paper towel so it’s damp (not soaked) and insert it in the plastic bag. Place the beans in the bag and seal it. Then, tape the bag to the back of the paper.
Step 4: Tape the paper to a window that gets a good amount of sunlight. And that’s it! Sit back, and watch your beans grow! The beans will normally start to sprout in 3-7 days.
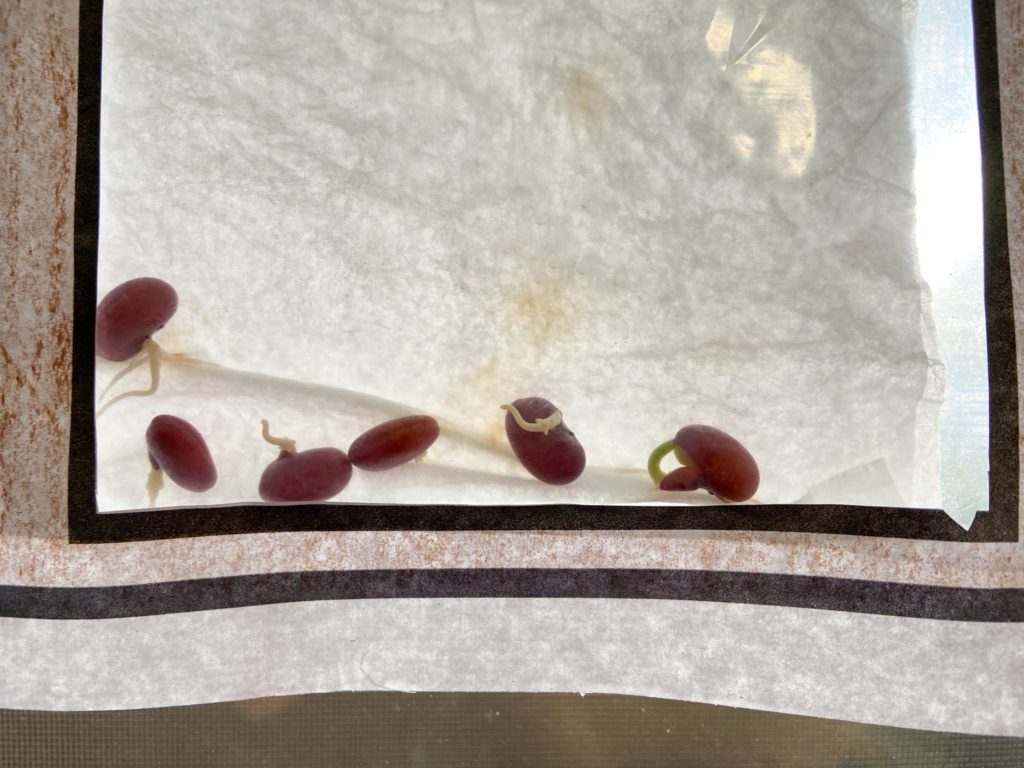
The paper towel may get a little moldy over time. If so, gently remove it and replace it with a fresh, damp paper towel.
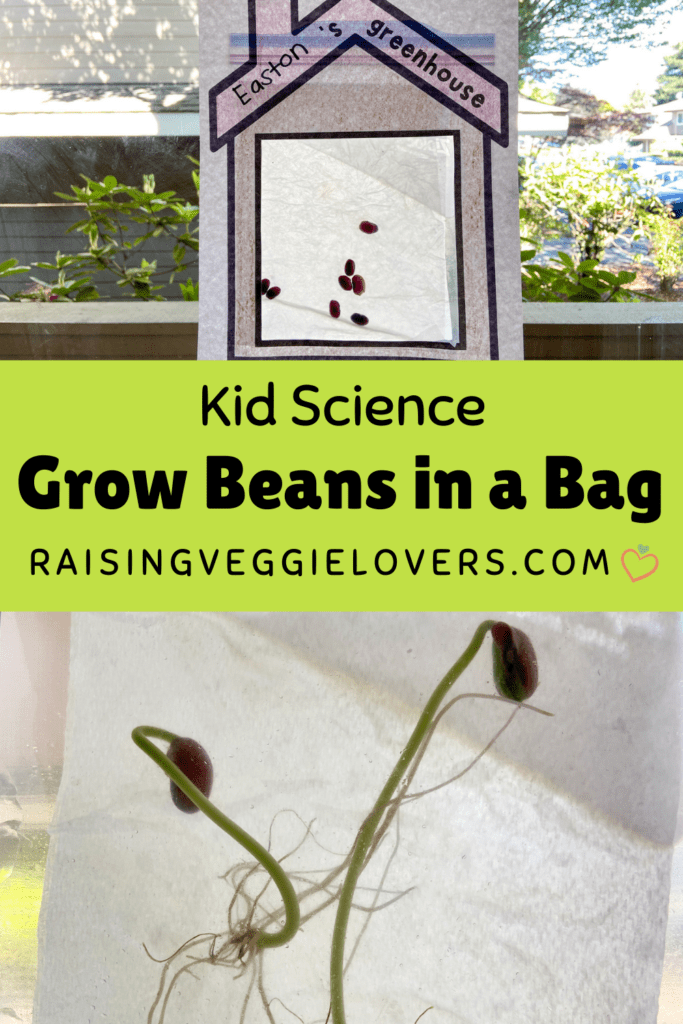
Once your beans have grown roots and a stem, you can plant them and continue to watch them grow. Check out this Easy Self Watering Milk Jug Planter .
Download the Free Printable
Download the free printable to frame your beans in a bag!
Try these other kid science activities!
- How to Make Your Own Dinosaur Fossil Rocks
As always, sharing is caring! Please click on the buttons below to share this post with your friends!
Leave a Comment Cancel
Your email address will not be published. Required fields are marked *
Email Address
Save my name, email, and website in this browser for the next time I comment.
Hi! I'm LeeAnne, a homeschooling mom of two. Thank you for visiting Raising Veggie Lovers, a resource for fun crafts, educational activities, parenting tips and vegetarian recipes.
Recent Posts
- 4 Ways To Help Your Child Relax at Bedtime
- How To Use Food To Resolve a Thumb Sucking Habit
- 5 Life Lessons To Teach Your Kids Through Gardening
- 6 Safety Tips for Gardening With Children
- 4 Benefits of Teaching Your Kids Where Their Food Comes From

IMAGES
VIDEO